The user interface
Let’s look at the UI elements in the figure.
Zoom and pan
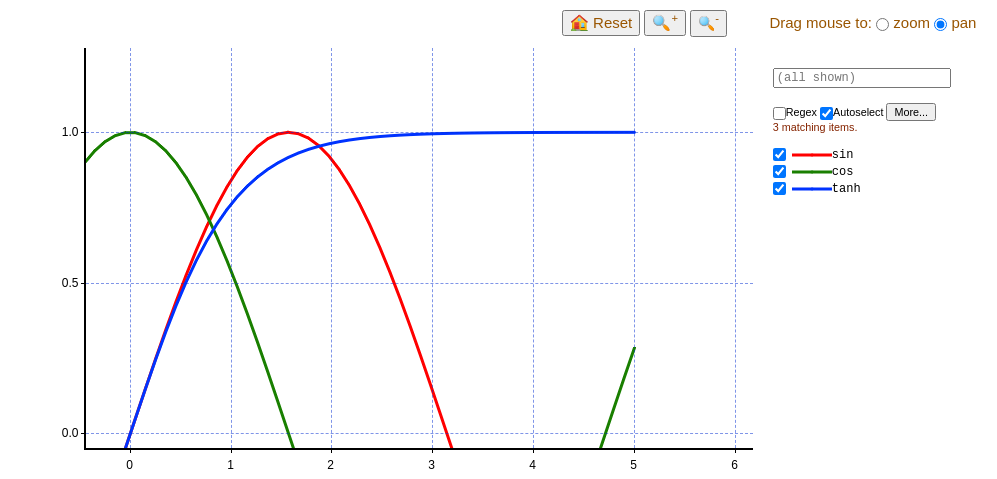
Let’s revisit the simple graph example in the tutorial:
import croquis
import numpy as np

fig = croquis.plot()

for fn in np.sin, np.cos, np.tanh:
    X = np.linspace(-5, 5, 100)
    Y = fn(X)
    fig.add(X, Y, label=fn.__name__)

fig.show()
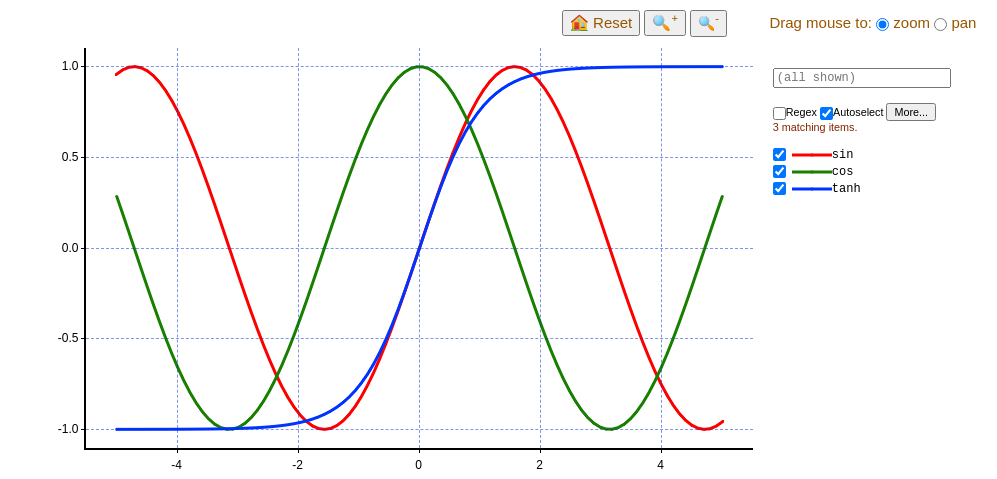
If zoom is selected on the upper right corner, you can drag and select a rectangular area:
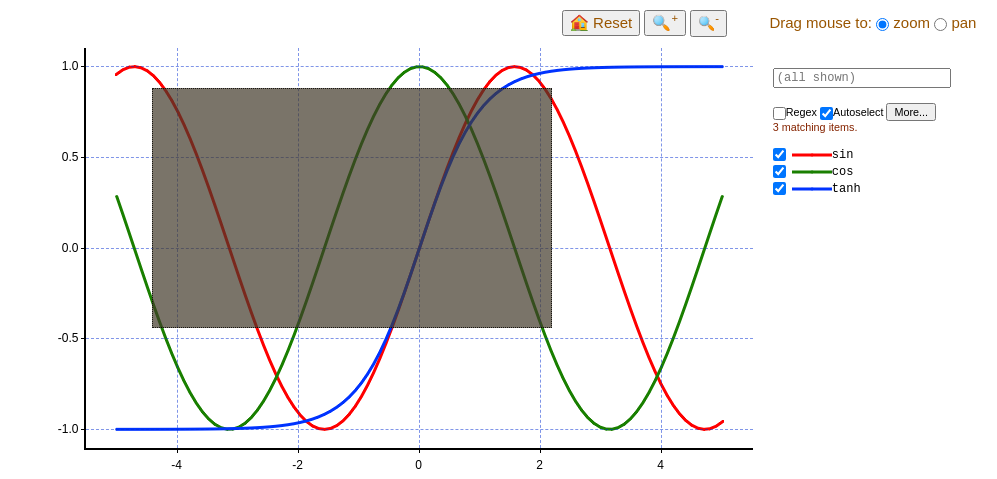
The selected area will be zoomed:
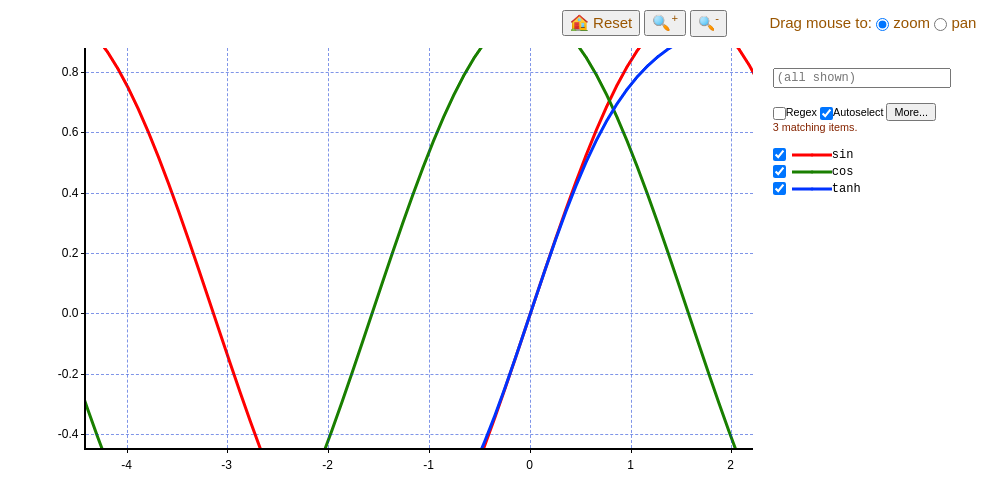
You can also use the magnifier (🔍) buttons to zoom in/out, or use the 🏠 Reset button to return to the initial state.
If you select pan on the upper right corner, then you can drag the plot around with the mouse:
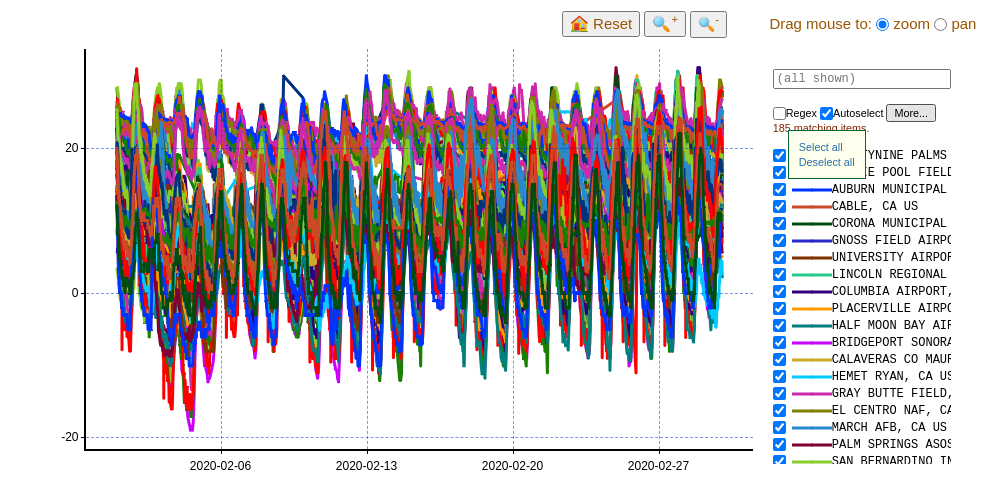
Search and selection
Croquis lets you interactively select/deselect a large number of items based on labels. As an example, let’s play with the temperature data of weather stations in California and Hawaii during February 2020 1:
import os
import croquis
import pandas as pd

csv_filename = 'CA_HI_Feb2020.csv.gz'
if not os.path.exists(csv_filename):
    import urllib.request
    urllib.request.urlretrieve(
        'https://raw.githubusercontent.com/yongjik/croquis-extra/master/noaa_temperature_data/CA_HI_Feb2020.csv.gz',
        csv_filename)

df = pd.read_csv(csv_filename)

fig = croquis.plot(x_axis='timestamp')
fig.add(pd.to_datetime(df.timestamp, unit='s'), df.temperature, groupby=df.name)
fig.show()
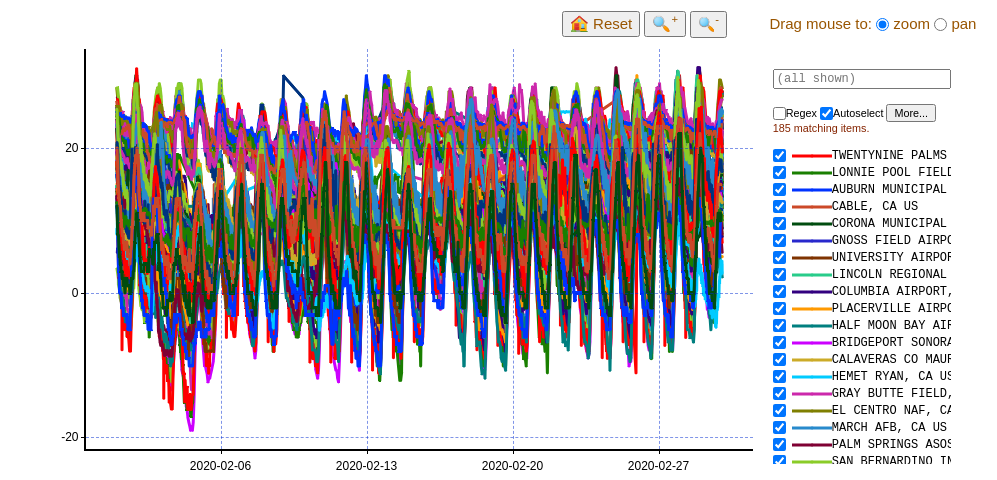
- 1
The data was derived from hourly temperature data archives, downloaded from NOAA website.
You can hover your mouse cursor over the plot, and the corresponding line will be highlighted with its label and the nearest coordinate:

By default, the search box is in Autoselect mode, i.e., the figure will show exactly those that matches the search box:

If you check the Regex button, the input is interpreted as a regular expression (and case sensitive):

You can also hide/show individual items by clicking on them in the item list (which also turns autoselect off). In this mode, you can also do bulk select/deselect by clicking on the “More…” button. The pop-up menu is pretty straightforward: “Select all” and “Deselect all” do what they say, and if the search box is not empty, “Select/Deselect all matching ‘…’” bulk updates all matching items.